5 Ways To Combatting Black Ice On Driveways
Winter months bring along the joy of snowmen and hot cocoa, but they also usher in an invisible foe: black ice. Especially on driveways. Ah, the dreaded “black ice on driveway” problem.
Understanding Black Ice Driveway Safety: The Invisible Winter Threat
Ever strolled down your driveway, only to find yourself suddenly skating unintentionally? That’s black ice on driveway. Sneaky. Almost invisible. And for many, a winter nightmare. The thing is, it’s not about the cold alone. It’s more about “when does black ice occur most often”. Interestingly, it’s during those twilight hours of dawn or the slight warming of midday, followed by freezing temperatures.
Instant Traction on Ice: Why Specialized Agents Beat Traditional Salt
Let’s talk solutions. First up, “Walk On Ice”. Imagine having the power to tread confidently on black ice. That’s this traction agent for you. Salt and its buddy, the regular ice melt, often take a while to kick in. Worse still, they stand defeated in front of black ice. But Walk On Ice? It’s like the superhero of traction agents. Instant grip. No more unexpected driveway ice-skating.
Get ready for winter with Walk On Ice instant traction on snow and ice
Top 5 Black Ice Prevention Tips and Combat Techniques for Homeowners
- Winter Driveway Safety Tips: Identifying High-Risk Conditions
The first line of defense is always knowledge. Understand the conditions when black ice forms. Cold nights after sunny days, check your driveway!
- Sand vs. Salt for Black Ice: Pros, Cons, and Effectiveness
Good old salt and sand. While salt might need time, it lowers the freezing point of water. Sand, on the other hand, doesn’t melt ice but sure does provide grip. Keep in mind though, salt doesn’t always work on black ice and sand is messy and temporary.
- Advanced Prevention: Using Heated Mats for Black Ice Control
Got a heated driveway? Fantastic! If not, portable heating mats are available. Lay them before the freeze. While they’re not magic, they can keep the ice away. But, yes, they’re expensive and have their cons.
- Strategic Snow Removal to Utilize Solar Melting
If your driveway is in direct sunlight, use it. Clear snow promptly, letting the sun do its work. Melted snow can’t become ice if it’s gone.
- Mineral-Based Traction for Black Ice and Immediate Grip
This one deserves another mention. Fits in a bag or glove box. Safe for everyone—pets, humans, and the ground beneath us. Its magic lies in the suckers that drink up the water layer on ice, allowing grippers to lock in. Result? A non-skid surface. Both for driving and for those treacherous walks to collect the morning paper.
At What Temp Does Black Ice Form? The Science of Surface Freezing
Black ice usually shows up when surface temperatures hover at or just below freezing — about 32°F (0°C) — but that’s a simplification. The crucial point is the surface temperature, not only the air thermometer. Pavements, concrete, and asphalt cool faster (and stay colder) than air, so a driveway can freeze even when the forecast says “near freezing.” Also watch for meltwater from a warm afternoon that refreezes overnight: that thin film of water is the exact condition that produces black ice. Practically: when night lows are predicted between roughly 25–34°F and the surface is damp, treat the area as potentially glazed.
When Does Black Ice Occur? Identifying Peak Danger Windows
Black ice loves transition periods. The most common windows are:
- Pre-dawn — after a clear night the ground is coldest.
- Just after sunset — when daytime warmth collapses quickly.
- After brief warm spells or rain — melt during the day followed by a quick freeze.
- In calm, clear conditions — clouds trap heat; clear skies let heat radiate and surfaces cool fast.
If you’re leaving early in the morning or returning late, take an extra second at the top of the driveway and test with your foot or shovel before committing your full weight. The time-of-day pattern means a driveway that seemed fine at 9am can be dangerous by 6pm.
Where Black Ice Forms First On Your Property: High-Risk Hotspots
It’s not random — black ice tends to show up first on the spots that lose heat fastest or collect moisture:
- Bridges, ramps, and overhung sections of driveway (cold air flows above and below).
- Shaded areas under trees or next to north-facing walls that never see direct sun.
- Where roof runoff or gutter flow lands on the pavement — those drip lines refreeze into ice ribbons.
- Edges, slopes and depressions where water pools.
Walk the driveway with this in mind: edges, corners, and shaded strips are high-risk even if most of the drive looks clear.
Black Ice Removal Methods: How to Safely Clear Your Driveway Without Damage
When you find a glassy patch, your response matters. Here’s a practical, non-redundant sequence you can use — it’s the order that actually works:
- Block and warn: Keep people and cars off the patch if possible (cones, a bright shovel laid across, or a note on the door). That avoids accidents while you work.
- Mechanical first (if feasible): Use a flat-bladed shovel to chip away thin ice where it’s safe to do so. Don’t gouge asphalt—work gently and from the edges inward. For concrete, a small ice chisel works but be cautious.
- Immediate traction: If you need to cross right away, sprinkle a traction agent like Walk On Ice — something that gives instant bite. This is not the same as melting; it’s about creating a safe walking/driving surface now. (A mineral traction product stays put and is non-corrosive.)
- Apply a safe deicer where melting is required: For thicker black ice that must be removed rather than just walked on, use an eco-friendly deicer formulated for paved surfaces. Apply per instructions, allow time to work, then chip and clear slush. Avoid heavy rock salt on decorative concrete or fresh asphalt — it shortens pavement life.
- Follow up and prevent re-freeze: After melting and clearing, sweep away residual grit and apply a light layer of traction agent in high-traffic spots so any refreeze isn’t immediately dangerous.
If the black ice covers a long slope or the surface is repeatedly affected by runoff, consider longer-term fixes: redirect the runoff, add drainage, or install heated mats for entry steps.
Walking on Black Ice Safely: A Proactive Emergency Action Plan
- Step 1: Don’t walk or drive over it — test carefully.
- Step 2: Mark the area and keep people away.
- Step 3: Sprinkle a traction agent for immediate safety.
- Step 4: If you need melting, use a safe deicer for concrete/asphalt, wait, then remove slush.
- Step 5: Address the source (gutters, shading, pooling) so the patch doesn’t return.

Conclusion: Mastering Driveway Safety and Black Ice Removal
Those five combat techniques you already use are solid — awareness, sand/salt, heat, sun, and traction agents — but adding a little science and a clear action sequence changes them from “things you did” into “things that actually prevent falls.” Knowing at what temp black ice forms, when it tends to occur, and where it forms first on your driveway turns you from reactive to proactive. And when it does appear, following the step-by-step removal approach above — immediate traction + targeted melting + source control — is how you get rid of black ice without creating new problems for your pavement, plants, or pets.
Other Ice Melt Products
Safe Paw
The Original and #1 Selling Pet and Child Safe Ice Melt for over 20 years. Guaranteed environmentally safe – will not harm waterways and sensitive wetlands. All products are made in the USA.

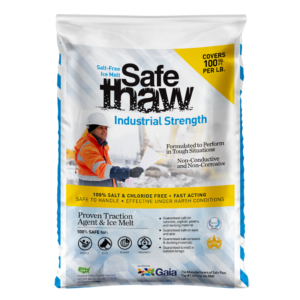
Safe Thaw
Imagine an ice melt you can put down and never worry about. It won’t harm pets, kids, and your property. That’s Safe Thaw. Unlike anything else on the market, Safe Thaw can change how winter affects our planet.